
How to use Posty: a video walkthrough
Learn how to use Posty by following Sunday Ember, the example candle brand in this walkthrough. Connect Instagram, Facebook and Threads, schedule a Reel by hand, then use the same media library to plan a month with ChatGPT. Watch the complete video or open the timed clip beside the step you need.
The complete Posty walkthrough
Before you follow along
Start with a workspace for your brand and a few photos or videos. Sunday Ember is the example used in the recording, so replace its name, accounts and content with your own.
- Your workspace and channels
- Use the workspace for the brand you are posting for. You need access to connect its social accounts and a paid plan for scheduling. Check the workspace timezone before picking publishing times. Compare plans
- Photos, videos and a brand voice
- Gather the media you have permission to publish. Phone photos, short videos and exported designs are enough. For the AI section, have a short brand brief or examples of captions you like.
- An AI connection for the final steps
- The manual steps work without an AI assistant. For the final section, connect Posty to a supported client and sign in with your own Posty account. The recording uses ChatGPT with an existing connection. Set up Posty MCP
Step 1: Connect the accounts you want to publish to
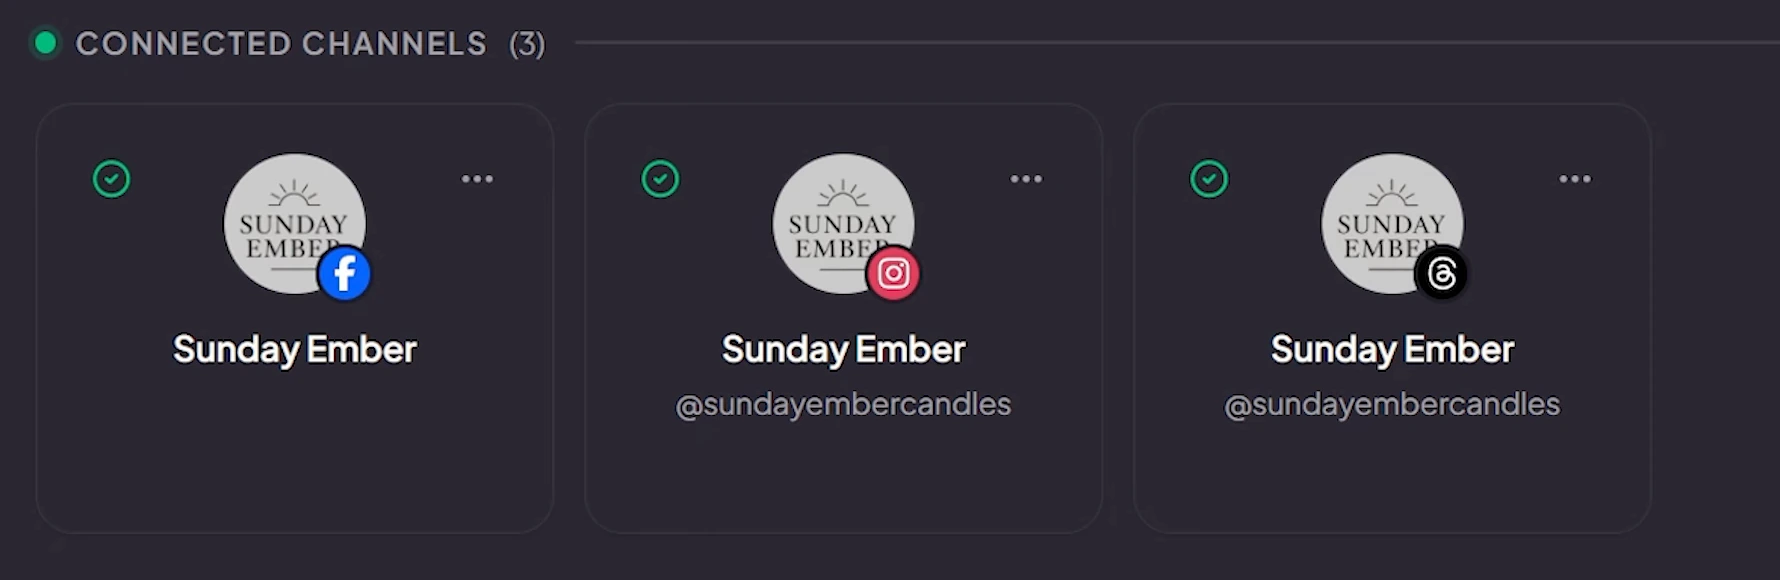
The Today page helps you get started. In the recording, we move straight to Channels using the plus button beside the channel list. Choose Instagram, approve the connection in Instagram and check that the correct account appears back in Posty.
Repeat for Facebook, selecting the Page you want to use, then connect Threads. Sunday Ember ends up with three connected channels. Check the account name on each one before you start composing.
If the sign in screen keeps offering the wrong account, open that network in another tab and sign out of the unwanted account, then try again. The connection guides below cover account requirements, permissions and other errors in more detail.
Watch this step from 0:24
Step 2: Upload the month’s photos and videos together
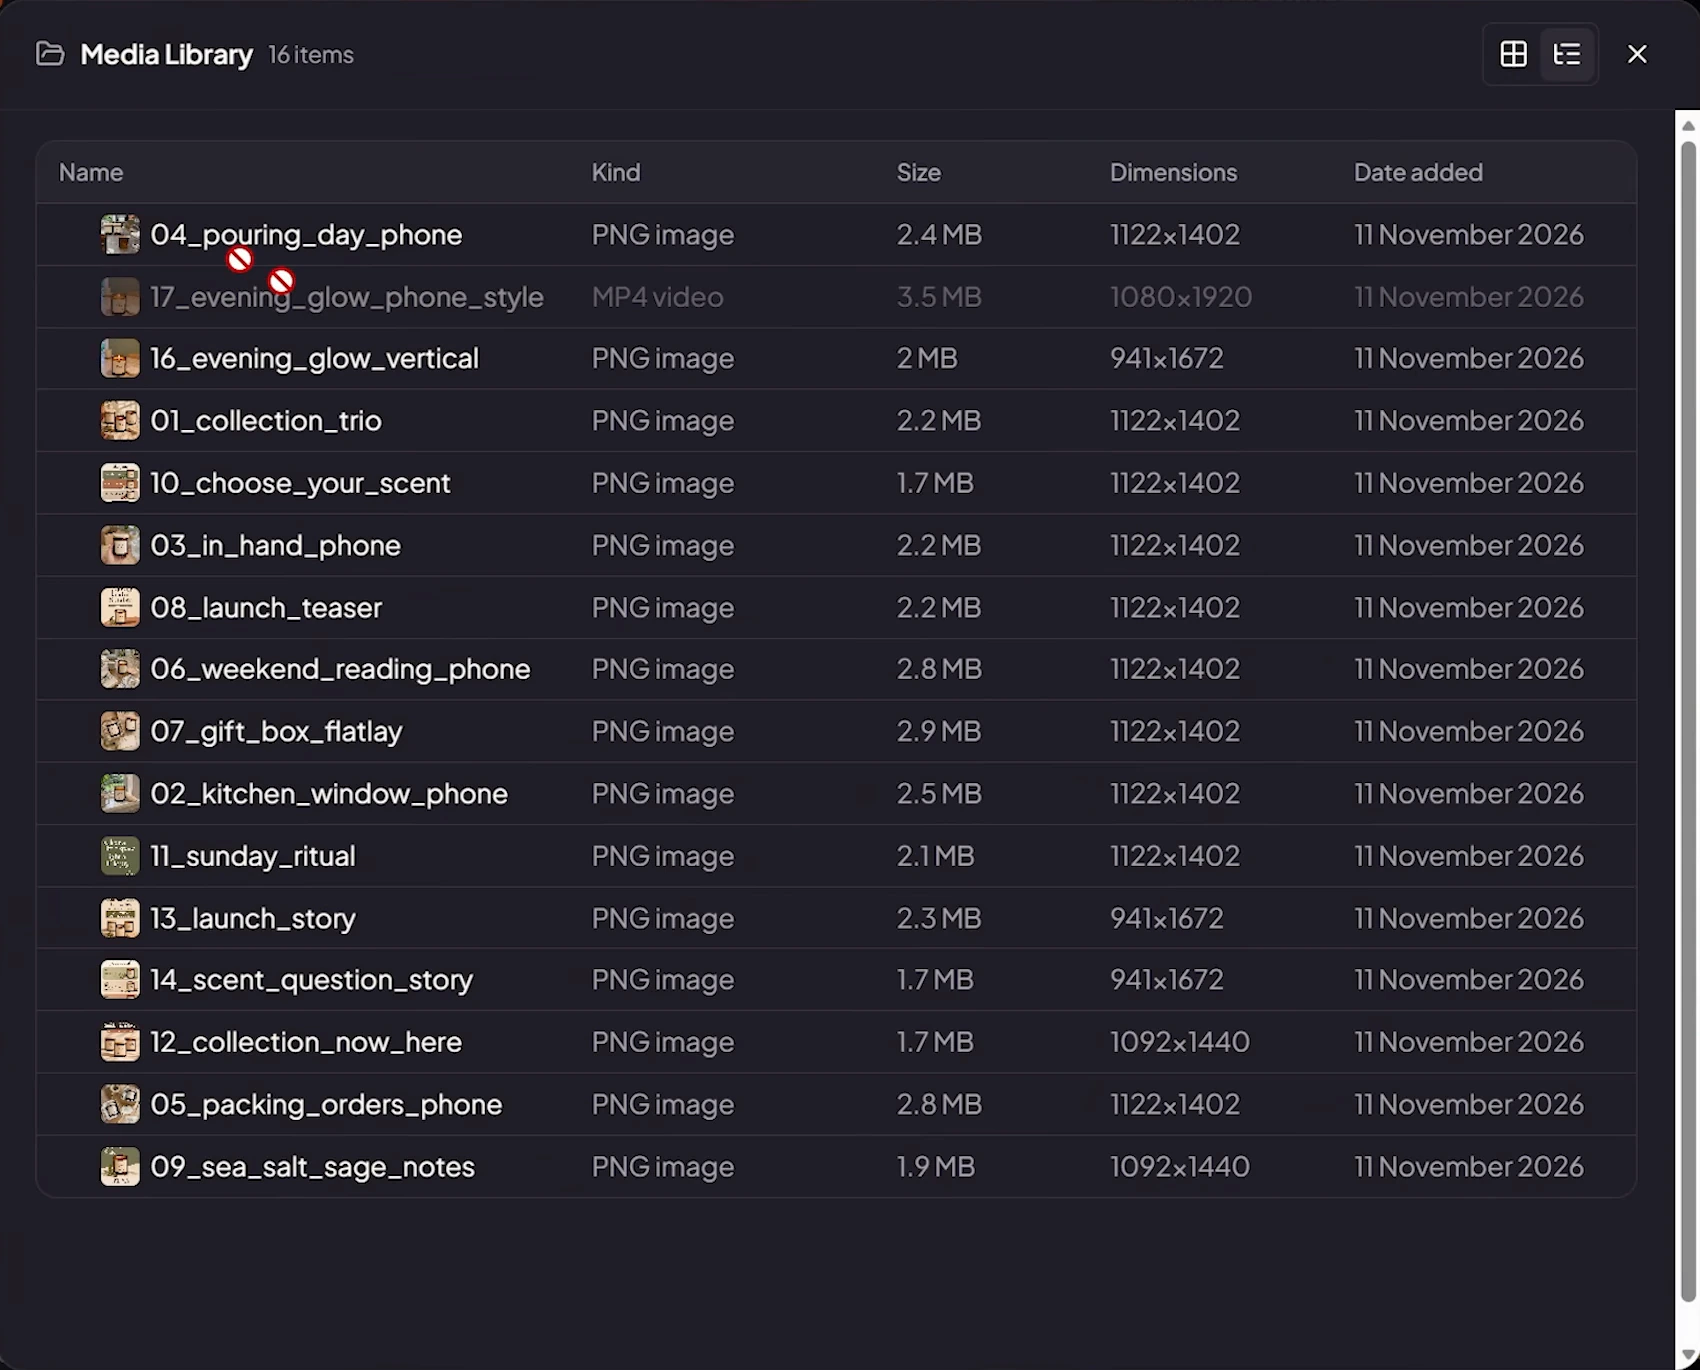
You can add media while composing a single post. For this walkthrough, we already have a month of material, so we open Media, choose Upload and select the files together. The example uses phone photos, candle videos and exported designs.
Wait for the uploads to finish, then return to Compose. Choose Add media and open the media library to reuse a file you have uploaded. Keeping the material in one workspace gives you and your connected assistant the same starting point later.
Watch this step from 1:40
Step 3: Choose the format, preview it and write the caption
Open Compose and select the accounts at the top. Add the candle video from the media library. Posty offers compatible formats for each account: in the recording we use a Reel for Instagram and change Facebook to a Reel too.
Switch between the account previews before writing. The Threads version does not suit this particular video, so we deselect Threads for this post. Connecting an account does not mean every post has to go to it.
Write the shared caption and add a first comment if you want one to follow the post. Preview both selected accounts again. The first comment is published on supported channels after the main post, so use it for a follow up question or extra context.
Priya Nair is typing…


Three ways to take your flat white this winter. Which one are you ordering? ☕ #bloomcoffee #wintermenu
Try the controls with sample content. The timed video shows the Sunday Ember example.
Watch this step from 2:30
Step 4: Choose the review flow and a publishing time
Check the approval option before scheduling. The recording shows no approval, optional review and the possibility of team and client review. We leave approval off for this solo example. Use the review process your workspace actually requires.
Instead of publishing immediately, open the schedule control and choose a future date and time. The example uses Friday at 10:15 am. Confirm the workspace timezone, review the selected accounts and choose Schedule.
Return to the calendar and find the Reel on the date you selected. Check its time and destinations. The recording also shows an earlier Facebook post pulled into the calendar; published history depends on the network and your plan’s available history.
- TikTok
Connected to this workspace only
Next post for Bloom Coffee
Only your team can see it.
Try the controls with sample content. The timed video shows the Sunday Ember example.
Watch this step from 3:42
Step 5: Keep feedback and history with the post
Open the scheduled post from the calendar to see its discussion. In the recording, a teammate leaves a reminder to tag someone. This keeps the feedback next to the content it refers to, instead of making the next editor find it in another conversation.
Check the history to see the recorded activity around the post. If you need to make a change, unlock the post for editing. Editing returns it to draft, so save and schedule it again, completing any approval your workspace requires.
Watch this step from 4:56
Step 6: Separate captions, first comments and platform options
A shared caption is a useful starting point, but a handle or call to action may need to change by network. Open Shared in the caption editor and separate Instagram. Edit that version, then switch back to Shared to confirm the other accounts kept their original text.
The first comment has a separate sharing control. In the example, Instagram can say link in bio while Facebook gets the actual link. Separating the first comment does not force you to separate the caption or media.
The recording also opens Instagram’s platform options to show tags and a collaborator. Those controls depend on your workspace’s enabled features and the connection you use. They are not the same as typing a handle in a caption. The video mentions covers and future Reel audio options; check your connection guide for what is available to you today.
Review the changed versions and schedule the post again. Check each account’s preview so that the version you edited is the one you intended to send there.
156 of 2,200
First comment
#fitzroycoffee #melbournecoffee #winterblend
Posted the moment the post goes live.
Try the controls with sample content. The timed video shows the Sunday Ember example.
Watch this step from 5:29
Step 7: Check results and reply from the inbox
Open Analytics to look at the information available for your connected accounts. Sunday Ember’s accounts are brand new in the recording, so there is little to report yet. As data becomes available, compare posts and use the available audience information to decide what to make next.
Open Inbox to move from results to conversations. Its Comments and Messages views bring supported network conversations into the workspace so you can read and reply there. The example accounts have no audience conversations yet, so this part shows where to find them rather than a live reply.
Available metrics, audience details, comment support and messaging support vary by network. Use the feature guides to check coverage for the accounts you have connected.
62.7k
+29% on the previous 30 days
- Day 30
- 2,367 reach
- Same day, previous period
- 1,394
| Day 1 | 1800 | 1630 |
|---|---|---|
| Day 2 | 2064 | 1394 |
| Day 3 | 2137 | 1247 |
| Day 4 | 1973 | 1299 |
| Day 5 | 1703 | 1512 |
| Day 6 | 1538 | 1725 |
| Day 7 | 1611 | 1777 |
| Day 8 | 1876 | 1630 |
| Day 9 | 2140 | 1394 |
| Day 10 | 2213 | 1247 |
| Day 11 | 2049 | 1299 |
| Day 12 | 1778 | 1512 |
| Day 13 | 1614 | 1725 |
| Day 14 | 2317 | 2307 |
| Day 15 | 2581 | 2159 |
| Day 16 | 2845 | 1923 |
| Day 17 | 2919 | 1776 |
| Day 18 | 2754 | 1828 |
| Day 19 | 2484 | 2041 |
| Day 20 | 1689 | 1725 |
| Day 21 | 1763 | 1777 |
| Day 22 | 2027 | 1630 |
| Day 23 | 2291 | 1394 |
| Day 24 | 2364 | 1247 |
| Day 25 | 2200 | 1299 |
| Day 26 | 1929 | 1512 |
| Day 27 | 1765 | 1725 |
| Day 28 | 1838 | 1777 |
| Day 29 | 2102 | 1630 |
| Day 30 | 2367 | 1394 |
Try the controls with sample content. The timed video shows the Sunday Ember example.
Watch this step from 8:00
Step 8: Invite people with the access they need
Open Teammates, enter the person’s email address and choose whether they belong to your team or are a client. Then choose the role that matches the work they should do, such as contributing content, approving it or viewing it.
Team and client visibility shape what the person can see, while the role controls what they can do. A client who only needs to review work does not need the same access as the person managing the workspace. The person joins after accepting the invitation.
Sees drafts, post history and team-only comments.
Priya can
- Create, edit and schedule posts
- Approve posts
- Upload media and reply in the inbox
Priya cannot
- Connect channels
- Invite people
- Delete posts
Workspaces Priya sees
- Bloom CoffeeAccess
 Northwind DentalHidden
 Harbour YogaHidden
Try the controls with sample content. The timed video shows the Sunday Ember example.
Watch this step from 9:04
Step 9: Connect an AI assistant through Posty MCP
The second part of the walkthrough switches to ChatGPT. Posty MCP lets a compatible assistant work with your Posty content through a connection you authorise. Open Posty’s MCP guide and follow the setup instructions for your client.
The recording asks the assistant to connect, but that account already has Posty installed. Treat it as a demonstration of an existing connection, not proof that a chat message completes setup in every client. Finish the client’s connection and sign in steps, then confirm that the assistant can find the workspace you want.
Watch this step from 10:12
Step 10: Turn your media library into a month of posts
Tell the assistant which workspace to use and that the month’s media is already uploaded. In the video, the request asks it to choose suitable images, write captions that complement them and schedule a month of content for Sunday Ember.
Give it your brand voice, audience, preferred networks, posting frequency and dates as well. A brand brief or approved caption examples make the request more useful than asking for generic posts. State the timezone and whether you want drafts for review or posts scheduled immediately.
The recording cuts to the completed batch. Open the calendar and inspect the result rather than assuming that every caption or format is right. The prompt below starts with drafts so you can review the batch before scheduling it.
Use my Sunday Ember workspace in Posty. Review the images and videos already in its media library. Propose a month of content for Instagram, Facebook and Threads using my brand brief. Ask me for the date range, posting frequency and timezone if they are missing. Create drafts for review, with a suitable format and caption for each account. Show me the proposed calendar before scheduling anything.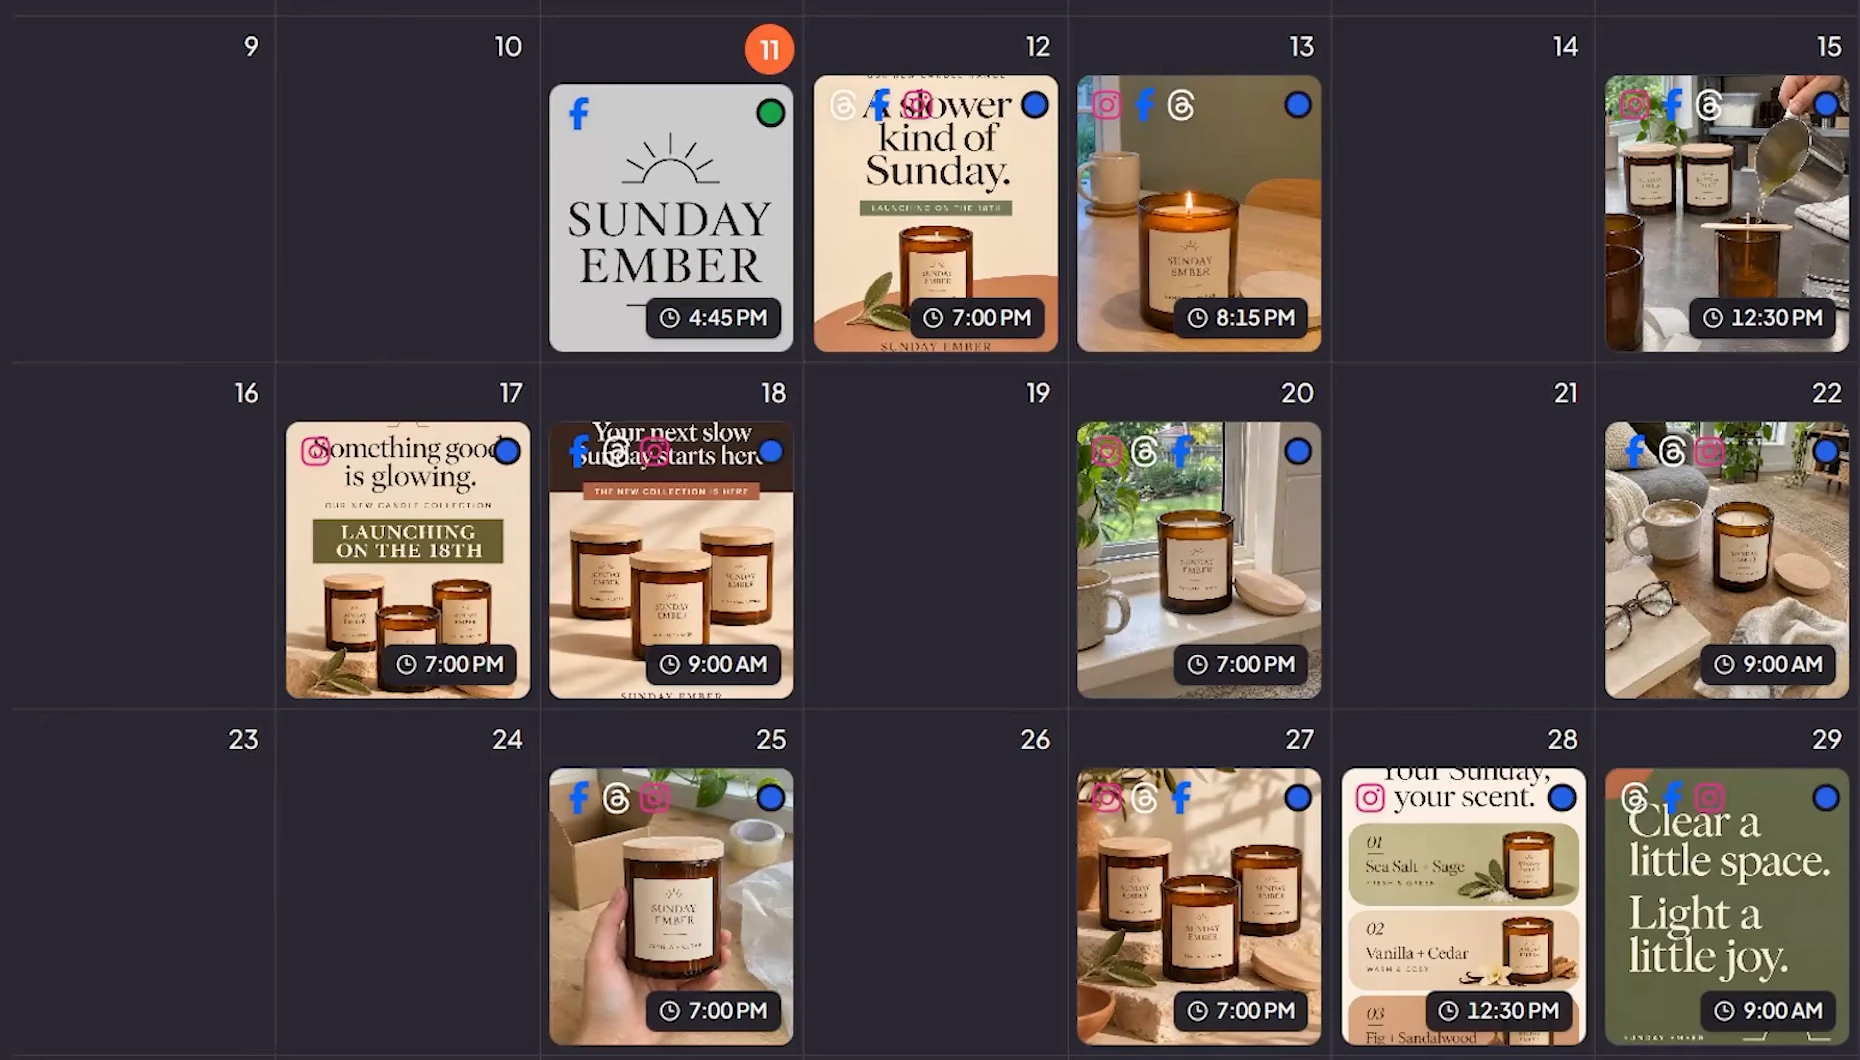
Watch this step from 10:52
Step 11: Ask for specific changes to the batch
You do not have to accept the first result. The video asks the assistant to remove Stories from the plan. You can also ask for a caption revision or move a post to a different time, then check the result in Posty.
Name the workspace, date range and posts you mean. A request to remove every Story could reach more content than you intended, so limit it to the batch you just created and ask to see which posts would change first.
In Sunday Ember, list the Story posts in the batch you just created. Show their dates and accounts, and propose a version of the plan without those Stories. Wait for my confirmation before removing any posts. Keep the Reel we scheduled by hand.Watch this step from 11:47
Step 12: Use published results to plan the next month
For the final demonstration, we switch from the new Sunday Ember accounts to Posty’s own workspace, which has published content and analytics. We ask the assistant how the posts are performing and tell it to use Posty’s analytics.
The response compares available results and links back to posts. Open those links and check the underlying figures. Views, reach, clicks and engagement measure different things, so ask the assistant to name the metric, platform and time period instead of treating every number as interchangeable.
Use the findings to choose what to repeat, change or test next. A small sample can suggest an idea without proving that it will work again. The figures in this recording describe those posts at the time of filming, not a promised result for your brand.
Use Posty analytics for my workspace and the last 30 days. Which published posts performed best on each platform? Name the metrics and date range, link to the posts, and flag missing data. Suggest three ideas to test next month based on the results. Do not change or schedule any posts.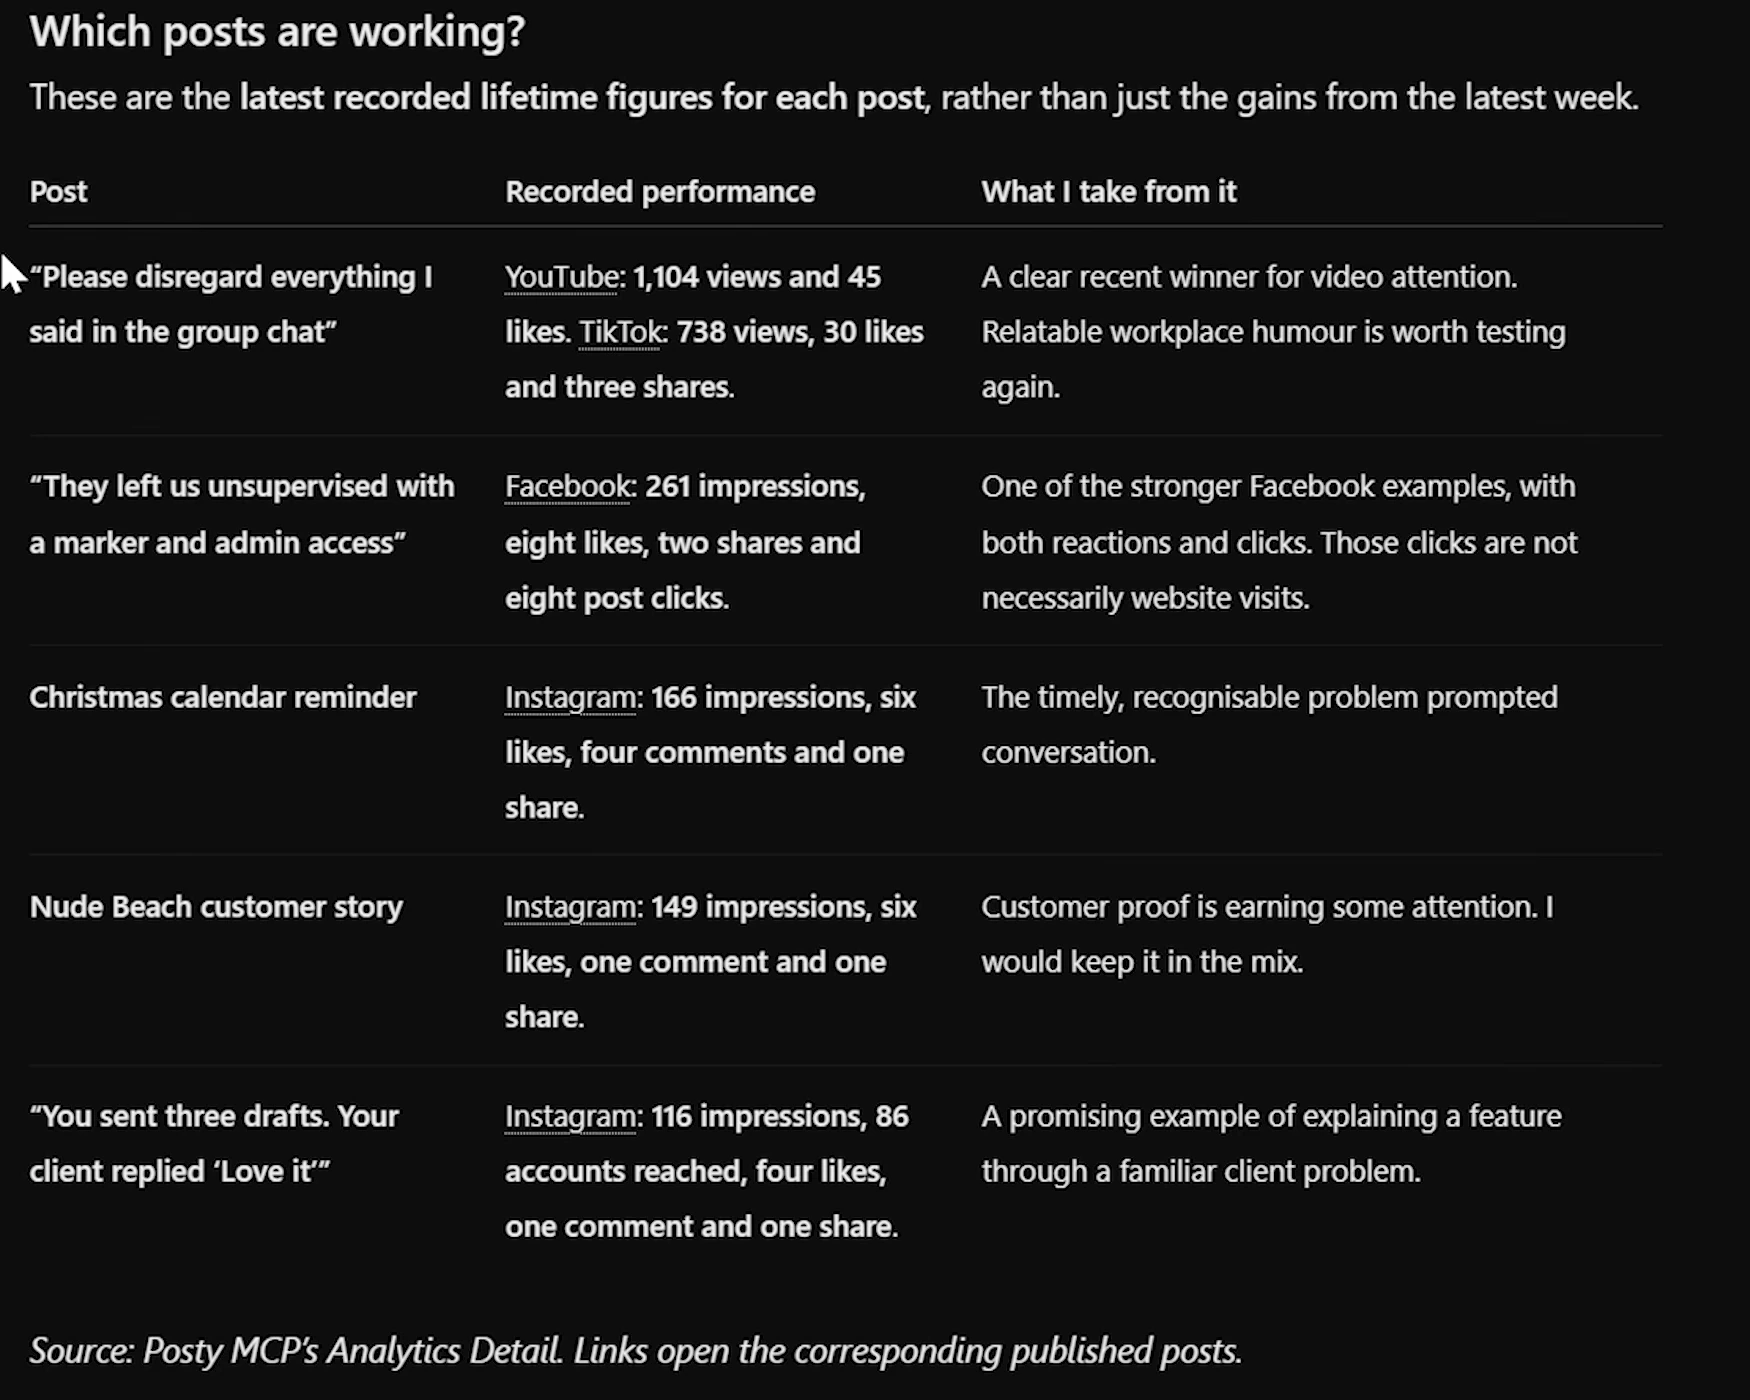
Watch this step from 12:12
Frequently asked questions
- Do I need AI to schedule posts in Posty?
- No. The first half of the walkthrough creates and schedules a post by hand. You can use the composer, media library and calendar on their own. Posty MCP is another way to work with your existing content through a connected AI assistant.
- Can I change one platform’s caption without changing the others?
- Yes. Open the Shared control in the caption editor and separate the channel you want to change. That channel gets its own version while the others keep the shared copy. First comments have their own sharing control, so separating a comment does not separate the caption.
- Can I follow the walkthrough from my phone?
- The recording uses the desktop app. Posty for iPhone and Android™ lets you upload from your photo library and work on posts. A compatible AI assistant can also use your Posty connection on mobile where that client supports it. Follow the setup guide for the client you use.
- Does the video show every feature on every plan?
- No. Scheduling requires a paid plan. Approval workflows are available on Growth and Accelerate, and the Instagram options shown depend on your workspace and connection. Free includes Link in Bio only. Check the linked feature guides for the options available to you.
- Will AI generated posts publish without another review?
- An assistant can schedule posts when your instructions, permissions and workspace approval rules allow it. If you want to review first, explicitly ask it to create drafts. Check the workspace, media, captions, formats, dates and timezone before approving or scheduling the batch.
Get your first month into the calendar
Connect your channels, upload your media and schedule your first post. Build from there when you are ready. Paid plans start with a 7 day trial that needs a card and bills the plan you chose automatically unless you cancel.